London to Brighton Veteran Car Run 2018
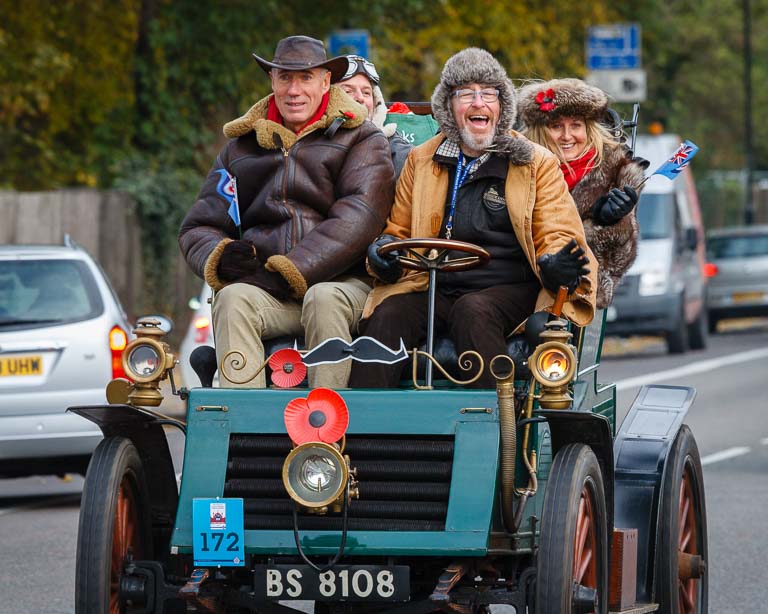
Enjoying the drive during the 2018 London to Brighton Veteran Car Run.
The first Sunday in November always brings the renowned London to Brighton Veteran Car Run. It is the world’s oldest motoring event which has run continuously. A widely held belief is that the event celebrates the abolition of the legal requirement for someone with a red flag to walk in front of a motorised vehicle. In fact, the run marks the day when the maximum permitted speed rose from 4 to 12 mph. The need for a man with the flag having been abolished some years earlier in 1878. Nevertheless, the start of the 1896 run did see the symbolic burning of a red flag.
November is not an ideal time of the year to drive over 50 miles in vintage cars. Many are open to the elements and they break down. A lot. Making repairs with cold hands, especially if it is raining, cannot be much fun. If only the parliamentarians of yore had had the good sense to pass their reforming Act during the summer. Only cars manufactured before 1905 are eligible to participate. It makes for an unusual spectacle, seeing the old timers taking to the road. It helps that the organisers encourage participants to wear period attire, although many don’t.
The route passes close to my home and I try to photograph the event whenever possible. It is worth mentioning the equipment I used, as I suspect it had a bearing on the results I obtained. The camera was my Canon 7D Mk 1, set to wide area continuous autofocus. It was actually the lens, though, which probably made the difference. Being a white Canon 70-200 f/4 , it seems to have attracted the attention of many of the participants. Maybe I looked professional and stood out from the other Read More
Sigma Resurrection
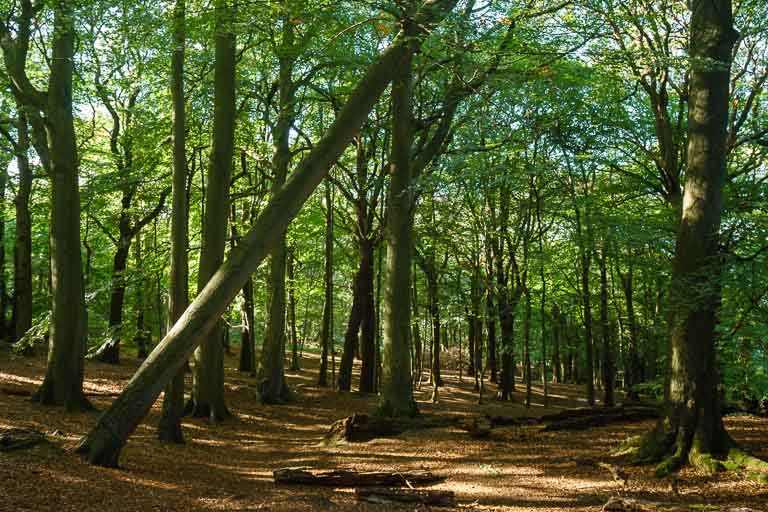
My local woods, taken at the long end of a vintage Sigma 18-35 lens set to f/8. I rescued the lens from obscurity in a cupboard where it had languished for 14 years after becoming incompatible with Canon’s newst cameras.
A New Era
With Canon’s and Nikon’s recent announcements of their new full frame mirrorless camera systems, complete with new mounts, adapted lenses are in vogue. It is the only solution which the two companies can offer in an attempt to retain existing DSLR customers as they transition over the next few years. It is a journey I have recently started, although in my case I am adapting my EF lenses onto a Sony A7 II. Not, I dare say, something which Canon had in mind. The irony is that for years I used the lenses on crop sensor cameras and always thought I would eventually switch to full frame. I just never imagined that the camera concerned would not be manufactured by Canon.
The Sony A7 II is a recent acquisition. My main intention being to use it with my manual focus lenses, many of which are at least 30-40 years old. I do not intend to purchase any native Sony lenses but with a purely electronic interface between camera and lens, it is possible to mount EF lenses via an adapter. The one I chose is a Sigma MC-11 which seems to work reasonably well with my Canon lenses. Officially, it is only compatible with a specified selection of Sigma’s own offerings but that does not appear to matter. In theory, Sigma could disable compatibility with other manufacturers’ lenses via a firmware upgrade. That would be a counterintuitive measure which would only serve to deprive them of an income stream. This way, they are making sales without any responsibility should a particular lens not work properly.
An Old Lens
Many years ago, 1999 to be precise and when everyone was still shooting with film, I bought a Sigma 18-35 f/3.5-4.5 Aspherical zoom with a Canon EF mount. At the time, it was well regarded. There were a number of positive reviews and the price was relatively modest for such a lens. The shop I bought it from was Vic Odden’s at London Bridge, which closed in 2005. I have fond memories of Vic. He was a true gentleman and sold me the first camera I bought with my own money. His advice was always reliable and his sudden death in 1997 during a holiday in New Zealand had saddened many.
In those days, Canon and Sigma were locked in a game of cat and mouse. Canon never released the specification of the EF mount and Sigma had reverse engineered it. For whatever reason, they had not implemented the interface between lens and camera in full. Possibly to avoid patent infringement, but I do not really know. At the time I acquired the lens, Canon had just released its EOS 3 camera and it was known that the two were incompatible. Read More
Brighton Pride 2018
Brighton, Pride weekend and some of the most extrovert people on the planet were putting on a show. It was an opportunity too good to miss. Not having been to a Pride event previously, I went with a group organised by the Royal Photographic Society. That was definitely a good move. The parade started at 11:00, but it is worthwhile to arrive earlier as it is possible to walk around the assembly area on the seafront. There are a lot of people crowding the parade route and it is far easier to get shots beforehand.

A portrait taken before conditions became too bright for my 56 f/1.2 lens at a wide aperture
(Click on the thumbnail for a larger image)
Anticipating that it would be busy, my plan was to use my Fuji X-E2 and 56 f/1.2 lens, a combination I have previously used for street photography. The theory was that I would shoot at around f/2 to throw any distractions in the background out of focus. Unfortunately, theory did not translate into practice for a couple of reasons. The event took place in the middle of a heatwave and conditions were very bright. The mechanical shutter on the X-E2 has a fastest speed of 1/4000 sec. Combined with a minimum ISO of 200, as the sun climbeed ver higher in the sky, I soon found that the camera was over exposing by around a stop. It was only afterwards that I realised that I could have switched to the camera’s electronic shutter which to goes to 1/32,000 sec.

These “ladies” were a popular subject
(Click on the thumbnail for a larger image)
Trading a smaller aperture for focal length versatility, I switched to my 18-55 f/2.8 – f/4 XF lens and shot wide open. Fuji offers bundles which include this lens, but its capabilities are far beyond those normally found in kits. Mine remains on the camera for the majority of the time and it is my most used lens. There was another problem, though, the autofocus system. Most of the time it functioned well, but occasionally either it would not focus or took a second or so which meant that I missed some shots. I suspect that the issue was that I had set the camera to use the central Read More
Amateur Photographer of the Year Competition – Round 1 Result
I did it on the spur of the moment, a last minute decision. A couple of days before entries closed for the first round, I became aware of the Amateur Photographer of the Year (APOY) competition. Actually, that is not strictly true. The UK based Amateur Photographer magazine has organised it for several years and I have occasionally entered it. The last time was over three years ago. Despite some success with my shot that time, I had not participated since. (The story of that photo is worthy of a post of its own and I have an article in preparation.)
The APOY Competition
The competition is held over eight rounds over the course of the year, each with a different theme. The top 30 images receive points, 30 for first place and down to 1 for 30th. Readers of the magazine receive a free entry, although by paying a fee it is possible to submit up to three images in each round. Only the highest placed one will receive any points, though. That is a change from last year. A very good nature photographer was successful with multiple entries in some of the rounds. He racked up sufficient points in his speciality to win the overall APOY competition by a wide margin.
Sigma sponsors the competition and the winner of each APOY round receives some of the company’s gear with a £1,000 value. The person with the highest tally when all eight rounds are complete is the overall winner and receives £2,000 worth of equipment in prizes. As a contest, it is real test of photographic ability and diversity. And there are some worthwhile prizes, to boot.
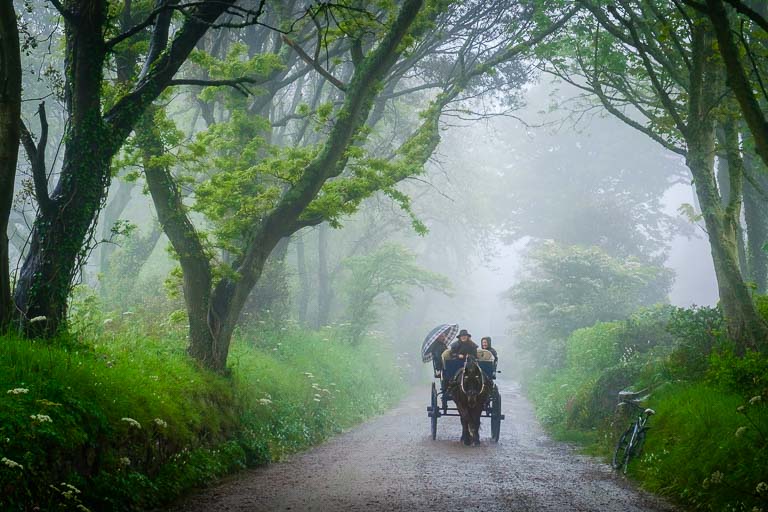
Misty Morning on Sark
(Click on the image for a larger version)
What changed this time? The theme for the first round was “Best of British” for photos taken within the British Isles and I had an image which I thought could do well. Looking at the list of topics, I have others which I thought might be appropriate for the later rounds. Being a reader of the magazine, I had nothing to lose by entering and considered that it would be an interesting challenge. Until last year, it was only possible to submit one entry per round and I decided to stick with that ethos. The process to determine which of my photos would succeed best is certainly a challenge which prove to be instructive.
Strangely, for the first round, I was more concerned with semantics than aesthetics. My shot, above, comes from Sark which is one of the Channel Islands and closer to France than the United Kingdom. It is British but not part of the United Read More
Is Swirly Bokeh Possible From a £23 Lens?
In my previous article, I looked at the performance of my Russian made Helios 44M lens when used for distant subjects. In this follow-up post, I will look at how well the lens does in rendering out of focus backgrounds. That might not have been a primary consideration for either the designers or the original users. In the years after the second World War, it became the standard lens supplied with Zenit film cameras. These days, it is more likely that the subject will be close and the background deliberately thrown out of focus for a bokeh effect. That is the current fashion and exploits the features of the lens which many find desirable. In particular, the Helios 44 has achieved renown for swirly out of focus areas.
The link to my earlier blog article: How sharp can a £23 lens be?

Snowdrops at Compton Valence (Helios 44M @ f/2.8)
(Click on the thumbnail to view a larger image)
Shooting For a Bokeh Effect
What, then, to shoot? To maximise the out focus effectively means positioning a subject close to the camera for optimum background blur. One of the subject clichés for this type of work is flowers and I mainly went with that. To compensate for a lack of originality, I told myself this was purely a test which I did not expect to yield any portfolio worthy images. In the event, the snowdrop shot above is one which turned out better than expected. It is a decent enough image although I would be unlikely to want to use it in a competition.
My technique when making these images left much to be desired. Handholding a manual focus lens at close distances is always going to be hit and miss. With the emphasis very much on miss. Achieving an acceptably sharp shot is difficult simply because it is almost impossible to maintain the distance between lens and subject after focusing. It is slightly easier with a mirrorless camera which has focus peaking, in this case my Fuji X-E2. The 1.5 crop factor meant that I had a full frame focal length equivalent view of a 87mm lens.
That was useful for the type of shot I was creating, although a hindrance when trying to produce swirly backgrounds. . Put simply, Read More
How Sharp Can a £23 Lens Be?
Is it really possible to get good results from a lens based on a design dating from 1928 and produced by the Russians at the height of the Cold War? There has long been the suggestion that Soviet production standards were not particularly high during that period. Supposedly, there was significant sample variation and defective lenses could get through quality control. Suffice to say, every manufacturing process has a level of inconsistency. Even today, lenses from the same production line in a modern factory will not perform identically. What hope, then, for the Helios 44? A lens made by the bucketload and which was as cheap as chips.
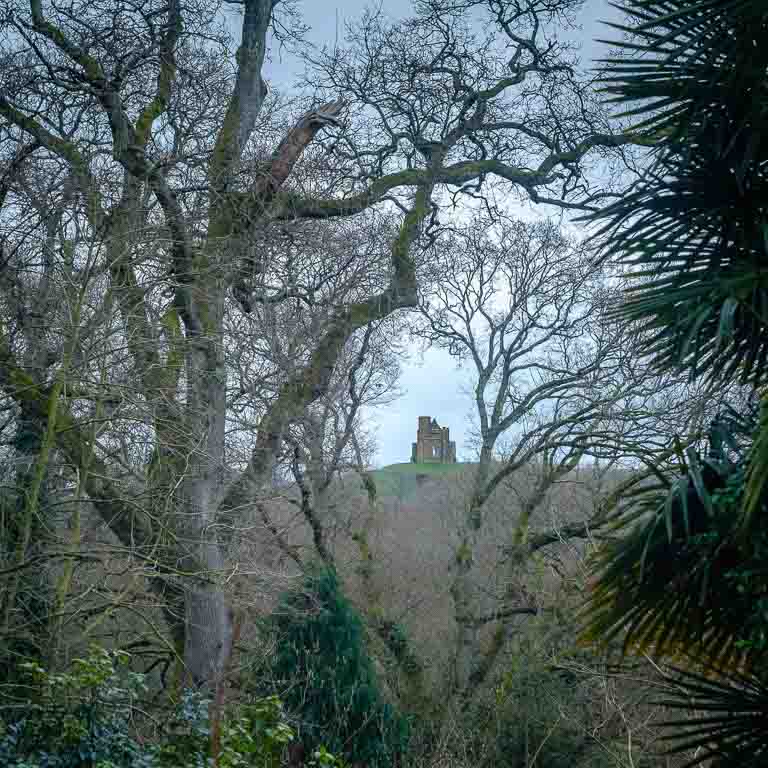
St Catherine’s Chapel – Final shot
(Click on the image for a larger version)
What follows is not really a lens test. I simply wanted to see how the lens performed in a specific circumstances and that is what I report here. Shooting resolution test charts does not hold much attraction. For me, it is the look and technical quality of the final image which matters.
Background
The Helios 44 has a 58 mm focal length and a maximum aperture of f/2. It is based on the 90 year old Carl Zeiss Biotar design. It appeared in many versions and was the standard lens for the Zenit range of SLRs. Due to their low cost, those cameras were the introduction to photography for many people in the heyday of film. Literally millions of the lenses were produced over a period which spanned decades.
The original Carl Zeiss factory was in Jena. It ended up behind the Iron Curtain in East Germany after the Second World War. Having access to the tooling and the remaining personnel who did not flee to the West at the end of the conflict, the Russians had a basis from Read More
Blessing of the River Thames – 14 January 2018
I came across this religous ceremony, the Blessing of the River Thames, by chance. The story is that I had travelled to London Bridge for an organised photo walk around the Borough Market area. Unfortunately, having mixed up my dates, I discovered it had taken place the previous day. Oops. The organiser is a friend and he informed me about this religious event in an exchange of texts after I realised my mistake. Every cloud, I suppose. Ironically, my mate had been there the previous Sunday when he thought the ritual was going to take place.
The blessing is a short service held each January on the first Sunday after Epiphany. This became the source of confusion about the date on the part of some sources. Epiphany fell on a Saturday this year, which apparently resulted in the ceremony occurring eight days afterwards. I do not understand sufficient about the Ecclesiastical calendar to proffer an explanation.
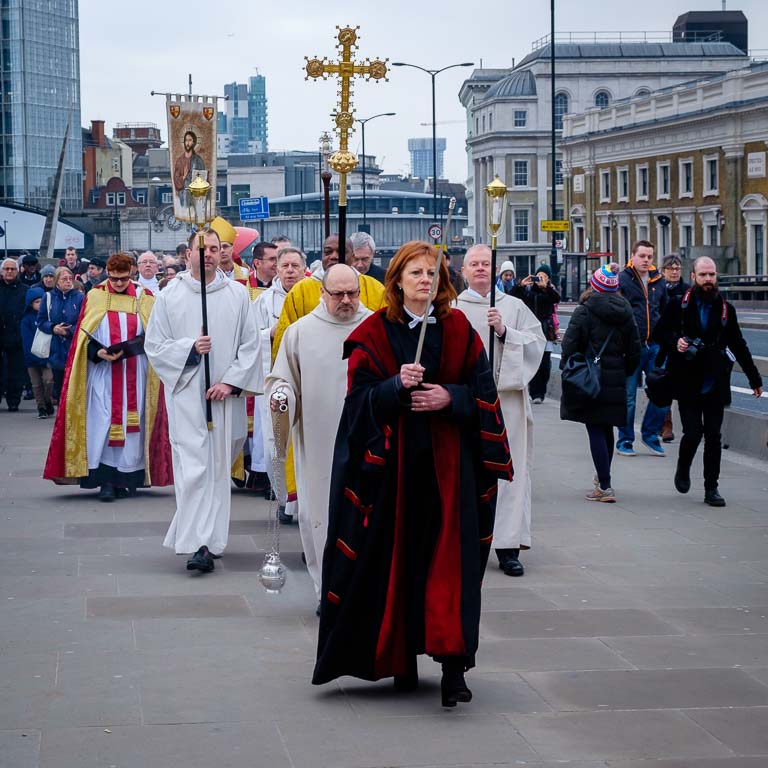
Participants from Southwark Cathedral
The ceremony involves the clergy and congegration from Southwark Cathedral to the south of London Bridge and their conterparts from the church of St Magnus the Martyr to the north. Each processes to the middle of the bridge where they meet. During the service, the clergy say prayers for those who have any form of association with the river. This year those prayers included one to remember those who lost their lives during last year’s terrorist attack in the area. Read More
It Wasn’t The Lens
Let me tell you about the competition judge who came to my camera club recently. The toughest, baddest, meanest judge I have encountered. You might possibly have seen someone harder; this guy was exceptional in my experience. He set the bar high and few of us fallible, flawed mortals managed to reach it. Even the slightest deviation from perfection met with a harsh penalty. Seldom have our images been subjected to such exacting scrutiny. He left no one in any doubt that attention to detail is necessary at every step to produce a successful result. A lesser judge would have struggled to gain acceptance with such a tough love approach, but he carried it off
Having work critiqued can be uncomfortable. This was a shock, especially for the club’s newer members. For some it provided the jolt needed to move their photography on. To take a greater interest in what happens after releasing the shutter to produce the final image. To investigate the depths and mysteries of applications such as Photoshop from which they had hitherto shied away.

Original image as submitted to competition
It was not the ideal occasion, then, to enter the photo above. It was a digital projected image competition and as soon as it came up, large upon the screen, both the judge and I saw it. Two large areas of discolouration on one of the Chelsea Pensioner’s tunic. It was unmissable. So how had I missed it? How, indeed?
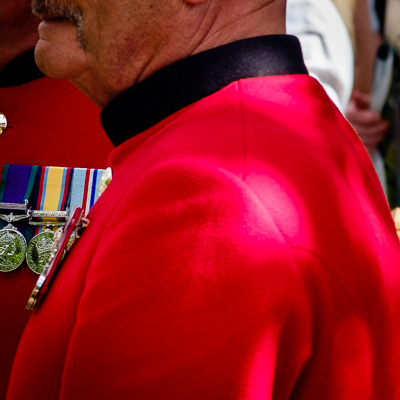
Hue shift detail
First, I needed to find the cause. The lens was the obvious culprit. Well, you know what they say about inept workers. The lens fell under suspicion purely due to its provenance. A Vivitar 70-150 f/3.8, some 30 plus years old, bought for £24-95 including postage from eBay. Lenses designed for the film era do not always perform well on digital cameras. My initial thought that the discolouration might be due to reflection between the rear element and the sensor’s shiny surface. A quick look at the initial capture proved the lens had done its job. Admirably well. What had happened was down to me.
I had processed the image in Lightroom and one of the application’s benefits is the History function, which keeps a persistent record of the adjustments applied. Even after closing the application, it is possible to step through the changes. The Vivitar was on a Fuji X-E2, which incorporates simulation of some of Fuji’s films when it creates JPEGs. The image started off as a Raw file, but Lightroom replicates those simulations. I had chosen to use the Astia/Soft setting and that is when the change in hue occurred.
It was subtle on my monitor, hardly visible at all. Only once I knew where to look did it become at all noticeable. It was when I output the final image as a high resolution JPEG that it become really conspicuous. My error was failing to check that the final image matched what I was seeing in Lightroom. It had never been a problem previously so I did not bother. The message, which the judge reinforced, was that issues can arise at any stage; attention to detail is all. It was not just those new to photography who learnt some painful lessons that night.
In the event, the shot achieved just 5 out of ten, which is about as low as it gets. To be fair, I had not expected it to do particularly well, but had hoped for a bit higher. My club has a lot of competitions, with three images, mainly consisting of new work, for each and every one. It is not easy to achieve a consistently high standard in both print and digital categories. My preference is to reserve my best work for prints. I am there more to make up the numbers when it comes to digital.
Apart from the discolouration, the judge did not like the expression of the woman on the right. I think it quirky and quite like it, but accept that it can be a distraction from the main subject. Some judges might agree with me, but competition is always a lottery. Based on the scores awarded to other images that night, it was always going to be an also ran. Even with perfect processing.
This is the reprocessed shot. I changed the film simulation to Provia, which now that I look at it again seems a better choice and the colours are more realistic. More importantly, I did no experience the change in hue. There is dappled sunlight on the former serviceman’s tunic and it was two of those areas which were the root of the problem. To avoid any potential issues, I applied a local adjustment to tone them down. I shall not be using the image again, so it became just a learning exercise. Hopefully, it is not a mistake which I will repeat.
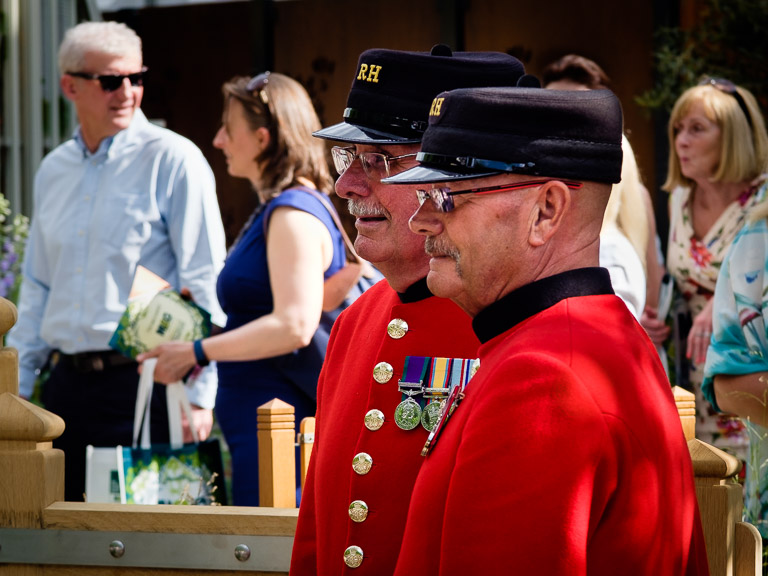
Chelsea Pensioners – corrected version
Lightroom Changes
My next blog post was going to be some pictures from a recent trip, but an announcement yesterday from Adobe has superseded that intention. It relates to a major application which not just I, but many photographers worldwide use to manage and process our images, Lightroom. While I have Photoshop, I find that I rarely venture into it nowadays. Lightroom has its limitations, but Adobe has provided a sufficient range of adjustments to allow quick and easy processing for most purposes.
Adobe’s statement is both significant and controversial. It marks the next stage in its transition from applications running on users’ own computers to accessing data and functionality via the Internet. Access can still be from a conventional computer, but equally from a mobile phone or tablet. So called cloud computing, in other words. As part of that, in future users will no longer store images on their own machines. Instead, they will be online in the Cloud.
Background
Until now, Lightroom has been available in three differing forms. Originally, at its introduction in 2007 it came solely as standalone software with a perpetual licence. Users paid once and could use it for as long as they wished. That was the usual software supply method back then and is still the one many consumers favour. Over the years, Adobe added many significant enhancements. By version 4 it had matured into a strong and versatile product, with two major iterations since. Compared to what had gone before, the updates in those later releases were relatively minor.
In 2015, Adobe made a fundamental change to the traditional software pricing model. It announced that future versions of its main applications would only be available by paying a monthly subscription as part of its Creative Cloud initiative. Lightroom was an exception. There was both a standalone edition (Lightroom 6) and a Creative Cloud version (Lightroom CC). Adobe committed to provide updates to Lightroom 6 to support new cameras and fix bugs, but new functionality would only made be available for Lightroom CC. There have been some useful additions to Lightroom CC in the past couple of years, but in essence the two versions are very similar.
During this period, Adobe also introduced Lightroom Mobile, a foray into cloud computing which allowed users to control and manipulate their images from their mobile phone or tablet. As it turns out, this was a harbinger for the way Adobe wants to operate in the future.
The significance of the announcement is that it marks a major shift towards the Cloud Computing model. The details are widely available across the Internet and as this is an opinion piece I will only summarise the main specifics.
- Updates for Lightroom 6 will cease after the end of 2017. There will be no Lightroom 7 and the sole options to run up to date, supported software will be by paying a monthly subscription.
- Lightroom CC becomes Lightroom Classic CC. The main change is a revision to the code to make the application run faster, although there are other improvements. As before, users install the software to run on their own machines.
- There is a new Lightroom CC, which only runs in the Cloud with image files stored there as well. At present, the new Lightroom CC does not have the same range of functions as its Classic sibling, but that will change over time.
Adobe’s Lightroom Strategy
What Adobe has done is commence the move away from purely supplying software to the provision of a service. Moreover, that is where it sees the future and it will be encouraging its users to migrate. Inevitably Read More
Swan
There are some places which I visit regularly, not because of their photographic potential but simply because I enjoy being there. One such place is the Swannery at Abbotsbury. It is situated at the end of the Fleet, a lagoon which lies behind Chesil Beach. Usually swans are very territorial and do not nest in close proximity. However, availability of food and the brackish water make such ideal conditions for rearing young that they tolerate each other and assemble in numbers.
The Fleet was formed after the last ice age, so it is likely that swans have nested there for thousands of years. In medieval times, there was a monastery at Abbotsbury and the monks took advantage of the easy availability of swans as a source of meat. There were strict religious dietary requirements which only allowed the consumption of fish on some days. Apparently, the meat has a fishy flavour so the monks applied some inventive logic. If it tastes like fish, it must be fish. As a consequence, they actively managed the colony, a practice which continues to this day. Not that anyone eats swan these days and the place has become a tourist attraction.
While I find the setting to be calm and restful, there is more to a photograph than that. Public access is restricted to specific areas and opening hours do not coincide with the best light. Swans are large, heavy birds which makes flying strenuous. Take-off requires a long, energetic run-up across the water and landing also requires space for the bird to come to a halt. Seeing a swan in flight, while not rare, is not that frequent either. That limits the opportunities for action shots, especially as swans moult during the summer and are flightless for around six weeks.
The challenge is to find something a bit different. In the spring, when they are laying their eggs, swans are not very active. They seem to spend most of their time resting so when I was there earlier this year I took some close-up shots. Then, as often happens, I moved on to something else and forgot about them. I came across them again when I decided to enter my club’s annual monochrome competition. It is a good one to do as entry is limited to prints, my preferred medium for the presentation of photographs. I had two images which I knew I wanted to enter, but needed a third. For a while, I was going to use one of a staircase at the Tate Britain building, but that is becoming a common subject these days. The swan it was to be.
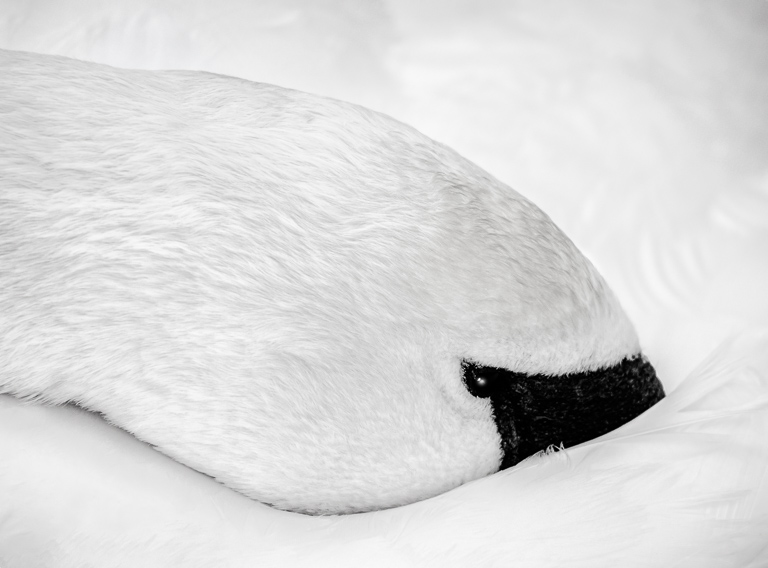
Swan
(Click on the image for a larger version)
I had taken the shot with the swan’s head level in the shot and wanted it at more of an angle. Rotating it removed more from the image than I wanted and resulted in too tight a crop. I needed to create a bit more space around the head and neck. Photoshop has a very useful Fill function, which has got me out of trouble on more than one occasion. I enlarged the canvas and used Fill in Content Aware mode to fill the empty space. Fortunately, the swan’s body consists of similartextures and it worked well. It is not a technique I would expect to be successful in all circumstances.
Head at the desired angle, I headed off into Nik Silver Efex Pro for the monochrome conversion. It remains the best software I have found and Google’s cessation of support is a concern. At some point, it will probably stop working if it becomes incompatible with another software provider’s update. Being mainly white, swans make a good subject for monochrome and I opted for a high key effect. Finally, I added a catchlight to the eye. It was not there in the original but judges, without exception in my experience, always want to see one. It is a dilemma. Pictorial purity or marks? I went for the latter.
My first attempt at printing was not a success. I chose a lustre paper and set the longest edge to 36 centimetres, my standard size for competition prints. It was way too large for such a subject and the paper unsuitable. I eventually settled for 24 cm and a matte paper, Fotospeed’s Smooth Cotton 300. It is one of their Signature papers, which bears Joe Cornish’s name and has his endorsement.
I finished it off by setting it in a mount made using Daler’s Cumulus Cloud mountboard. It is not a pure white and has a swirly texture, which I like. It sets the print off very well. Normally the orientation of a print and mount work best when there is an alignment of their longest edges. That works less with a small print in a large mount, which is 50 cm x 40 cm as is customary at camera clubs. I rotated the mount through 90 degrees so its shortest edge went against the longest edge of the print. Too central a positioning within the mount would have looked too static, so I weighted it towards the top.

A picture is worth a thousand words. The mounted print.
(Click on the image for a larger version)
So how did my makeweight image do in the competition? The rules state that the monochrome contest is only open for new work. In a sense, one of my images was not new. I have had it in competition elsewhere and it has always done well. It was, though, the first time I had used it at my club. If there is one thing predictable about judges, it is that they are unpredictable and there is no such thing as a certainty. Predictably then, while it got a reasonable score, it was the least favoured of my submissions. That said, it is this shot and was the most daring/riskiest of the three compositions.
The swan? Well that came top.